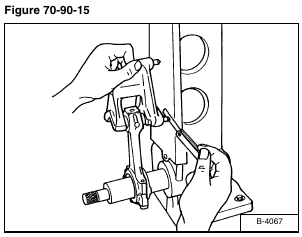
NOTE: The small end bushing is the basis of this check, check the bushing for wear before
doing this check.
Install the piston pin into the connecting rod.
Install the connecting rod on an alignment tool.
Put the gauge over the piston pin and move it against the face plate.
If the gauge does not fit squarely against the face plate, measure the space between the gauge and face plate [Figure 70-90-15].
If the measurement exceeds the allowable limit, replace the connecting rod.
Rod Alignment 0.002 in. (0,05 mm)
