Remove the drive belt shield. (See Shield Removal And Installation on Page 30-60-1.)
Remove the engine/hydrostatic pump package from the loader. (See Engine Removal And Installation on Page 70-10-8.)
Remove the drive belt. (See Belt Removal And Installation on Page 30-60-3.)
Remove the drive belt tension pulley. (See Tensioner Pulley Removal And Installation on Page 30-60-4.)
Remove the starter. (See Removal And Installation on Page 60-40-2.)
Remove the flywheel. (See Flywheel Removal And Installation on Page 70-110-1.)
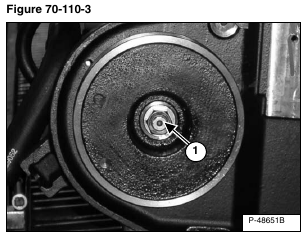
Remove the hydrostatic pump drive pulley mounting nut (Item 1) [Figure 70-110-3] and washer.
Installation: Tighten the mounting nut to 175 – 200 ft.-lb. (237 – 271 N•m) torque.
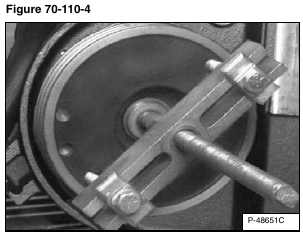
Install a puller in the drive pulley and remove the pulley from the hydrostatic pump shaft [Figure 70-110-4].
Installation: Install the pulley key in the shaft before installing the drive pulley.
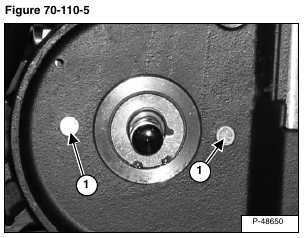
Remove the two mounting bolts (Item 1) [Figure 70-110-5] from the drive belt housing which mount the hydrostatic pump to the housing.
Installation: Tighten the mounting bolts to 65 – 70 ft.-lb. (88 – 95 N•m) torque.
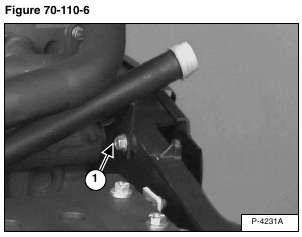
Remove the mounting bolt (Item 1) [Figure 70-110-6] from engine coolant tubeline mounting bracket which is attached to the flywheel housing.
Installation: Tighten the mounting bolt to 25 – 28 ft.-lb. (34 – 38 N•m) torque.
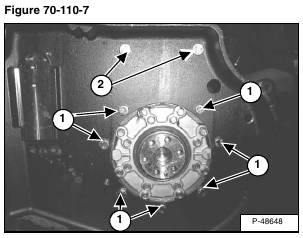
Remove the seven mounting bolts (Item 1) [Figure 70-110-7] which fasten the housing on the engine.
Installation: Tighten the mounting bolts to 35 – 40 ft.-lb. (48 – 54 N•m) torque.
Remove the 2 bolts (Item 2) [Figure 70-110-7] which fasten the housing on the engine.
Installation: Tighten the mounting bolts to 60 – 65 ft.-lb. (82 – 88 N•m) torque.
Remove the housing.
Reverse the removal procedure to install the housing.
