NOTE: Always use new O-rings, gaskets, and seals when assembling the hydraulic pump.
Put the hydraulic pump in the vise.
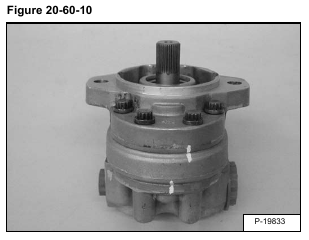
Put a mark across the housing of the pump for correct assembly (Item 1) [Figure 20-60-10].
NOTE: Only the Seal Kit is available for the hydraulic pump. If any other parts are worn, replace the pump assembly.
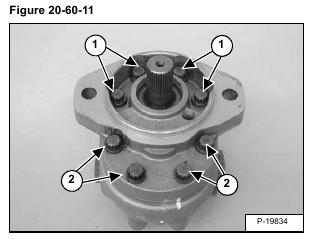
Remove the eight bolts (Item 1 & 2) [Figure 20-60-11] from the pump.
Assembly: Tighten the bolts 25-28 ft.-lb. (33-38 N•m) torque.
NOTE: Use new washers under bolts (Item 1) [Figure 20-60-11] during assembly.
Remove the pump from the vise.
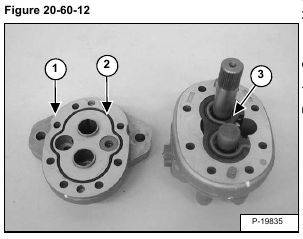
Remove the front cover (Item 1) [Figure 20-60-12] from the pump.
Remove the O-ring (Item 2) [Figure 20-60-12] from the front cover.
Remove the pressure plate (Item 3) [Figure 20-60-12] from the pump.
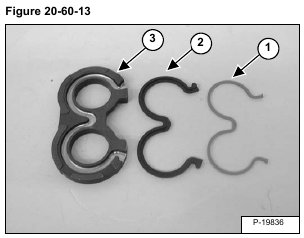
Remove the back-up ring (Item 1) and seal (Item 2) from the pressure plate (Item 3) [Figure 20-60-13].
Check the pressure plate for wear.
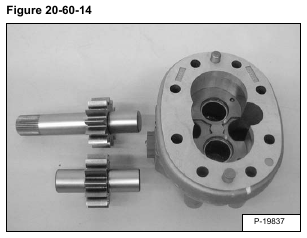
Remove the pump gears [Figure 20-60-14].
Check the gears for wear [Figure 20-60-14].
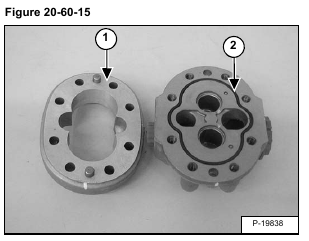
Remove the pump body (Item 1) [Figure 20-60-15] from the rear cover of the pump.
Remove the O-ring (Item 2) [Figure 20-60-15] from the rear cover.
Check the pump body and rear cover for wear.
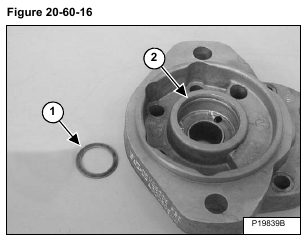
Remove the washer (Item 1) from the front cover (Item 2) [Figure 20-60-16].