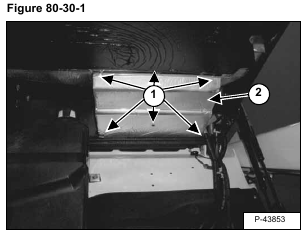
There are two different methods when cleaning the heater coil. The EARLY style requires you to remove the whole heater assembly to access the heater coil. The LATER style only requires the removal of the rear cover (Item 2) [Figure 80-30-1], the whole heater unit does not need to be removed.
If your rear cover has the six mounting screws (Item 1) [Figure 80-30-1] visable, then you have the LATER style. Only the rear cover needs to be removed to access the heater coil for cleaning.
LATER STYLE:
Loosen the six mounting screws for the rear cover (Item 1) [Figure 80-30-1]. The screws do not need to be completely removed, they are secured on the back with plastic retaining washers.
Remove the cover.
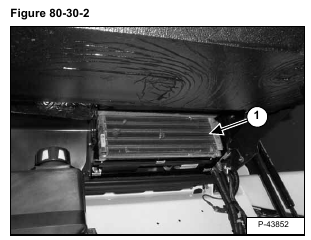
The heater coil (Item 1) [Figure 80-30-2], can now be cleaned with low pressure water or air. High pressure may damage the fins of the heater.
EARLY STYLE:
Raise the lift arms and install an approved lift arm support device. (See Installing Lift Arm Support Device on Page 10-20-1.)
Raise the operator cab. (See Raising The Operator Cab on Page 10-30-1.)
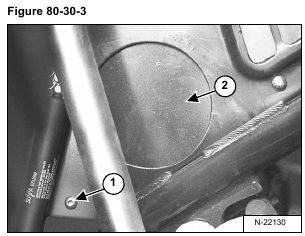
Remove the mount bolt (Item 1) [Figure 80-30-3] from the left side cab access cover.
Remove the access cover (Item 2) [Figure 80-30-3] from the loader.
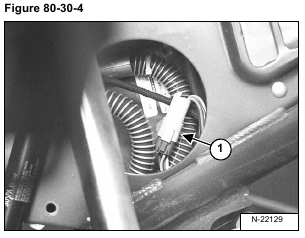
Disconnect the blower fan wiring connector (Item 1) [Figure 80-30-4] from the loader wiring harness.
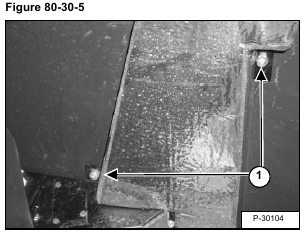
Remove the two mounting nuts (Item 1) [Figure 80-30-5].
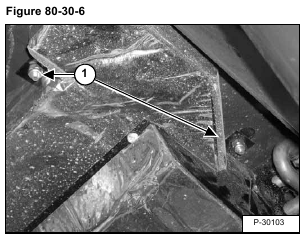
Remove the two mounting nuts (Item 1) [Figure 80-30-6].
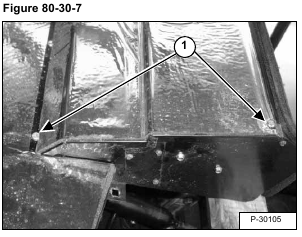
Remove the Heater Unit from the rear of the cab. Place it on the fenders of the loader supported with 2×4’s (blocking) [Figure 80-30-7].
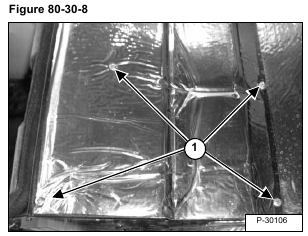
Remove the six mount bolts (Item 1) [Figure 80-30-7] & [Figure 80-30-8] from the rear cover.
Remove the rear cover from the unit.
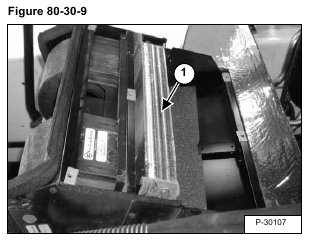
With air or water, clean the heater coil (Item 1) [Figure 80-30-9].
