Clean the outside of the cylinder before disassembly.
Use the following tools to disassemble the cylinder:
MEL1074 – O-ring Seal Hook
MEL1075 – Adjustable Gland Nut Wrench
MEL1075-2 – Special Offset Pins
Hold the hydraulic cylinder over a drain pan and move the rod in and out slowly to remove the fluid from the cylinder.
Put the base end of the cylinder in a vise.
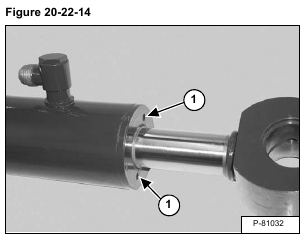
Insert the adjustable gland nut wrench into the holes (Item 1) [Figure 20-22-14] to loosen the head.
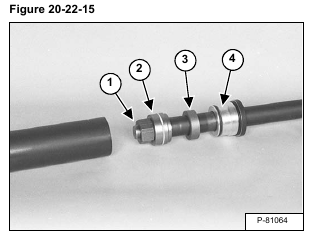
Remove the head and the rod assembly from the cylinder [Figure 20-22-15]. Put the rod end in a vise.
Remove the nut (Item 1), piston (Item 2), spacer (Item 3) and head (Item 4) [Figure 20-22-15].
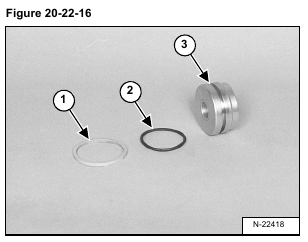
Remove the seal (Item 1) and O-ring (Item 2) from the piston (Item 3) [Figure 20-22-16].
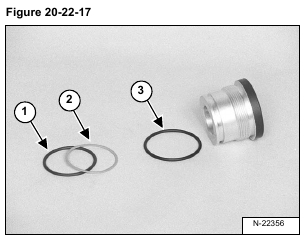
Remove the O-ring (Item 1) and the back-up ring (Item 2) [Figure 20-22-17].
NOTE: The O-ring (Item 1) and back-up ring (Item 2) [Figure 20-22-17] are no longer available parts. The seal kit will contain a one piece seal that is used in place of the O-ring and back-up ring.
Remove the O-ring (Item 3) [Figure 20-22-17].
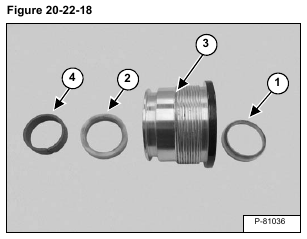
Remove the wiper seal (Item 1) and rod seal (Item 2) from the inside of the head (Item 3) [Figure 20-22-18].
Remove the wear ring (Item 4) [Figure 20-22-18].
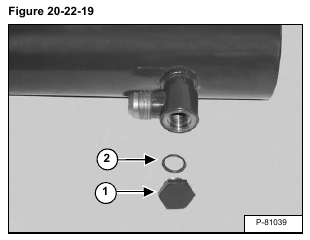
Remove plug (Item 1) and O-ring (Item 2) [Figure 20-22-19].
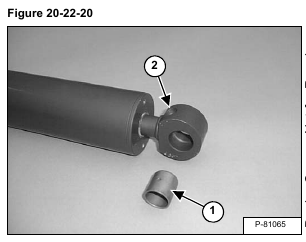
Remove the seals bushing (Item 1) [Figure 20-22-20].
Replace the grease fitting (Item 2) [Figure 20-22-20] if damaged or missing.
